2014年2月14日 星期五

Use WDS (Windows Deployment Services) to deploy Windows 8.1 (1/2)

0. Prerequisites for installing Windows Deployment Services
0.1 Server: Windows Server 2012 R2 - ADDS, DNS, DHCP
0.2 Client PC: PXE boot

1. Add Windows Deployment Services Role
1.1 Click "Add roles and features".

1.2 Click [Next >].

1.3 Check "Role-based or feature-base installation". 

1.4 Select your deploy server. Click [Next >].

1.5 Check "Windows Deployment Services".

1.6 Click [Add Features].

1.7 Click [Next >].

1.8 Click [Next >].

1.9 Click [Next >].

1.10 Click [Next >].

1.11 Click [Install].

1.12 Click [Close].


2. Configure Windows Deployment Services
2.1 Click [Tools] --> [Windows Deployment Services].

2.2 Right click your deploy server and select [Configure Server].

2.3 Click [Next >].

2.4 Click [Next >].

2.5 Click [Next >]. For production you can change to another hard drive.

2.6 Click [Yes].

2.7 Click [Next >].

2.8 Check "Respond to all client computers (known and unknown)". Click [Next >].

2.9 Click [Finish].


Use WDS (Windows Deployment Services) to deploy Windows 8.1 (2/2)

2014年2月12日 星期三

How to share SkyDrive documents with a browser

1. Sign in to SkyDrive
1.1 Go https://skydrive.live.com . Sign in with a Microsoft account. (If you don't have one, click "Sign up now")

1.2 After you sign in. You can see your home folder.


2. Share your folder
2.1. Click [Create] --> [Folder].

2.2 Type the folder name which you'd want to share to others. Then click [Create].

2.3 Check the folder you want to share. Then click [Share] on the top.

2.4 Enter the email who you want to share. Click "Recipients can only view" to change the permissions.

2.5 You can change to "Recipients can edit". When you finish, click [Share]. (For detail: Share files and folders and change permissions)


3. Find shared folder
3.1 Click [Shared] on the left sidebar, you will find shared folders which someone share with you.

3.2 After click one shared folder. You will see the files which shared with you.

3.3 After click the shared file. You can see the file's content. If you have edit permission, you can click [EDIT DOCUMENT] to select [Edit in Word] (You need MS Word) or [Edit in Word Web App]. When you edit it, it saves automatically. Others who can read the file can see it has been changed.

2014年2月7日 星期五

How to use Chrome Remote Desktop

0 Prerequisites
0.1 Install Google Chrome.

0.2 Sign in with Google Account.


1. Install Chrome Remote Desktop
1.1 Go Chrome Webstore. Search "Remote Desktop". Click [+ Free].

2. Run Chrome Remote Desktop
2.1 Go chrome://apps. Click Chrome Remote Desktop

2.2 For first using, you need to authorize your computer. Click [Continue].

2.3 Click [Accept].

2.4 Click [Get started].

2.5 Click [Share].

2.6 Give the access code to the person who will be assisting you.


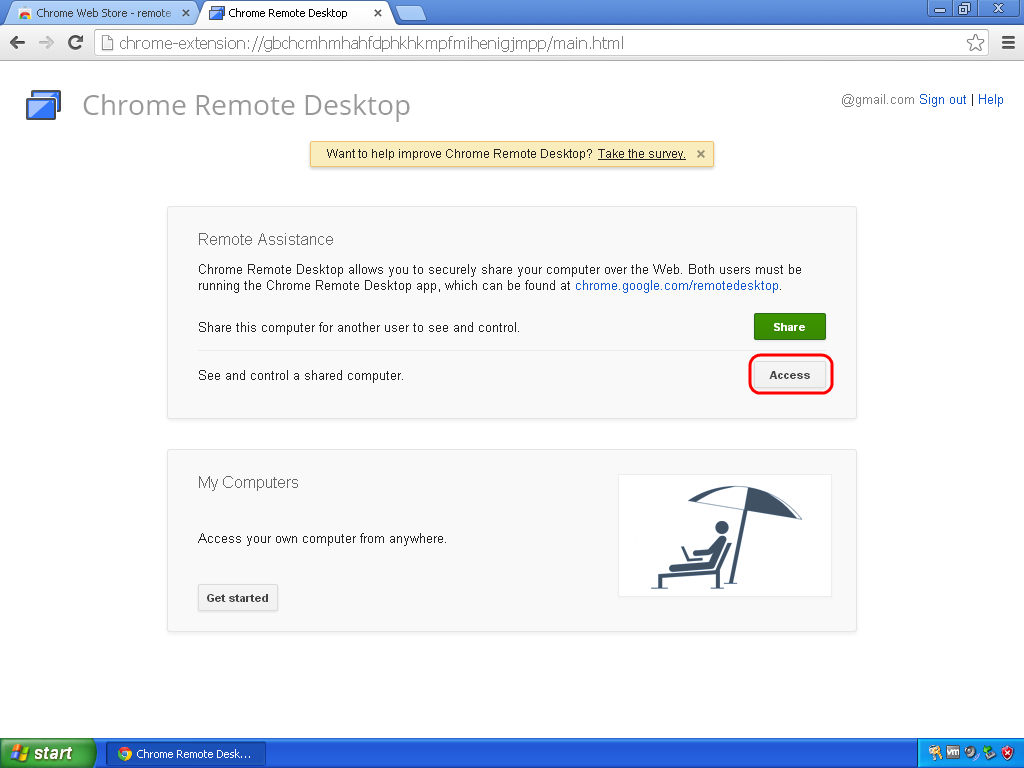
3. Run Chrome Remote Desktop to help
3.1 Go chrome://apps. Click Chrome Remote Desktop.

3.2 Click [Access] and input the access code.


2013年12月3日 星期二

Use "Computer Management" to control Hyper-V Server

If you want to use "Computer Management" to control your Hyper-V Server:

You may received following warning message "Computer xxx cannot be managed. ...":

You need to enable couple Firewall rules:
1. Open "Windows PowerShell".

2. Enable Firewall rules.
    "Enable-NetFirewallRule -DisplayGroup "Remote Event Log Management"
    "Enable-NetFirewallRule -DisplayGroup "Windows Firewall Remote Management"
    "Enable-NetFirewallRule -DisplayGroup "Remote Volume Management"

3. If need to remote control Disk Management, need to enable host Firewall rules.

4. Enable Firewall rules.

5. Now you can see your Hyper-V Server's disks.

2013年11月19日 星期二

VMware Player & vmnetcfg.exe

VMware Player is a very useful tool for evaluating software products. However, if you want to create a LAN lab, you'll need vmnetcfg.exe which you can find in VMware Workstation.

First, please make sure VMware Player and VMware Workstation are the last versions.

1. Run "Command Prompt".
2. Change directory to your download folder.
3. Type "VMware-workstation-full-10.0.1-1379776.exe /e .\temp".
4. Change directory to \temp folder.
5. Type "expand core.cab -F:vmnetcfg.exe .".
6. Type "expand core.cab -F:_vmnetcfglib.dll .".
7. Change file name "_vmnetcfglib.dll" to "vmnetcfglib.dll".
8. Copy "vmnetcfg.exe" and "vmnetcfglib.dll" to VMware Player installed folder. (default: C:\Program Files (x86)\VMware\VMware Player)
9. Run "vmnetcfg.exe".

2013年8月27日 星期二

How to setup CISCO QuickVPN?

RV042 10/100 4-Port VPN Router
Click [VPN] –> [VPN Client Access] from left sidebar.
1. Create Username and Password and click [Add to list].
2. Click [Generate] for generating a new Certificate.
3. Click [Export for Client] and save the file to the folder where QuickVPN installed. (Default: “C:\Program Files (x86)\Cisco Small Business\QuickVPN Client”)
4. Click [Save].

CISCO QuickVPN
Install QuickVPN Client
1. Download “QuickVPN Client for all Small Business Routers“.
2. Unzip and install.

Run QuickVPN Client
Type “User Name” and “Password”. Type router’s IP address at “Server Address”. Click [Connect].

How to setup Windows 8 VPN?

Create VPN Connection
1. [Win]+[x] –> “Control Panel” –> ”Network and Internet”

2. Click “Network and Sharing Center”.

3. Click “Set up a new connection or network”.

4. Select “Connect to a workplace”.

5. Select “Use my Internet connection (VPN)".

6. Type your VPN Server Internet address and Destination name. Click [Create].

Use VPN Connection
1. [Win]+[i] –> Network

2. Click [Connect] and type your User name and Password.